Step 2 describes how to set up an identification request using the OpenID Connect protocol and how to get end user through a user logon.
Topics found on this page:
Set up an identification request
An identification request is a URL used to initiate the E-Ident user identification session. The demo app configures the identification request in an HTML form that submits the request to the In Groupe E-Ident service:
[https://www.ident-preprod1.nets.eu/its/index.html].
The following parameters should be provided along with the request:
|
Parameter name |
Value in demo app |
|---|---|
|
client_id |
Contact support to request the client_id to use. |
|
redirect_uri |
http://localhost:8080/eident/return |
|
scope |
openid profile ssn cert |
|
response_type |
code |
|
state |
28/09/2017 |
Read more for a comprehensive list of all identification parameters.
User logon
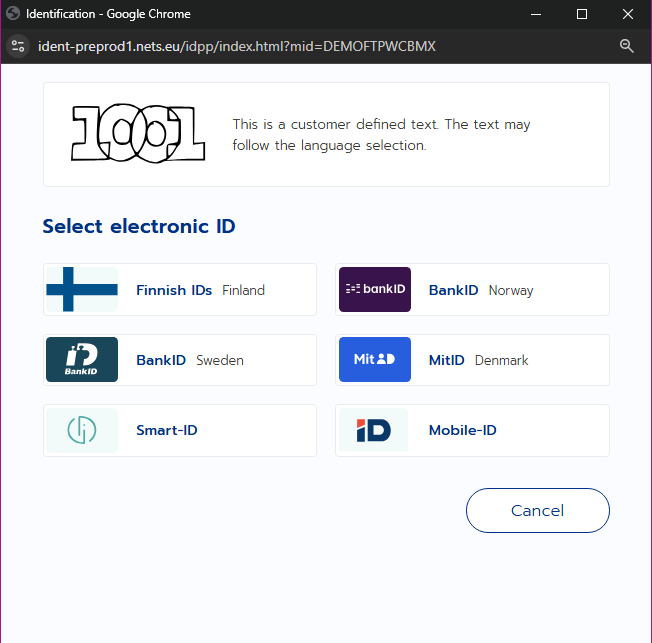
On initiating the identification session, In Groupe E-Ident service responds to the identification request with an appropriate eID, allowing the end users to identify themselves. The E-Ident service with the eID (or eIDs) can be presented in three ways: Pop-up, Standalone or Embedded. The E-Ident demo app shows you the usage of the first two.
For test users: Test users
Pop-up
The pop-up option allows customers to present E-Ident service UI in a window partly covering their own web UI. On mobile devices the window will cover the entire screen. Here is a sample of how it looks:
A simple pop-up can be setup with similar JavaScript code as below. The pop-up has to be opened by a user action. The example assumes that a button with id “open-popup-button” is used to start the identification flow.
<script>
  document.addEventListener("DOMContentLoaded", function() {
    document.getElementById("open-popup-button").addEventListener("click", openCenteredPopup);
  });

  window.addEventListener("focus", keepPopupInFocus);
  window.addEventListener("click", keepPopupInFocus); // Workaround for Firefox

  let popup;

  function keepPopupInFocus() {
    if (popup && !popup.closed) {
      popup.focus();
    }
  }

  function openCenteredPopup() {
    let width = 800;
    let height = 700;
    let x = window.outerWidth/2 - width/2 + window.screenX;
    let y = window.outerHeight/2 - height/2 + window.screenY;
    openPopup(x, y, width, height);
  }

  function openPopup(x, y, width, height) {
    popup = window.open("<eidentUrl>", "eident", "width=" + width + ",height=" + height + ",top=" + y + ",left=" + x);
  }
</script>
In the page given by redirect_uri parameter, closing the pop-up can be done with similar JavaScript code as below. The returned parameters like authorisation code or error message are in this example returned to the customer’s page in the main window.
<script>
  window.opener.location.href = "<get token url>" + window.location.search;
  window.close();
</script>
For more information about pop-up UI, see above.
Standalone user interface
In the standalone UI, the E-Ident service renders the user interface using the default E-Ident visual interface. To access the standalone UI, the following URL can be used (for customer test).
https://www.ident-preprod1.nets.eu/its/index.html?scope=openid&response_type=code&client_id= <clientid>&redirect_uri=<redirect_uri>&state=<state>&nonce=<nonce>
Upon successful completion, an authorization code is generated and returned to the application's redirect_uri.
More information about standalone UI.
Embedded user interface
Embedded user interface is no longer recommended due to various browser security restrictions when using iframe with content from a different origins than the page itself.
More information about the embedded UI.
Continue to Step 3.