
You can try our Trust Portal for free, register here to get free access to Trust portal for seven days!
How to register and generate password
How to register and generate password
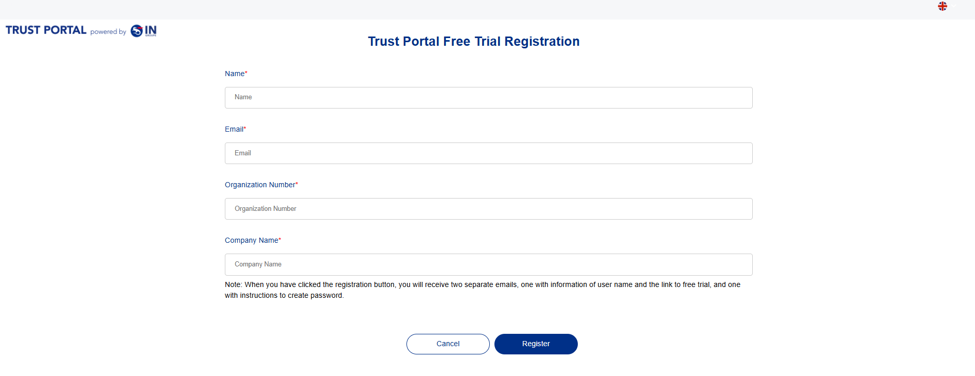
Click on the registration link and fill out the form.
When you submit the form, you will receive two different emails:
-
Email with a link to Trust Portal trial version
-
Email to generate password
Restriction: Only emails not previously registered in the free trial solution or the email ID is not registered as a user in our solutions will be allowed.
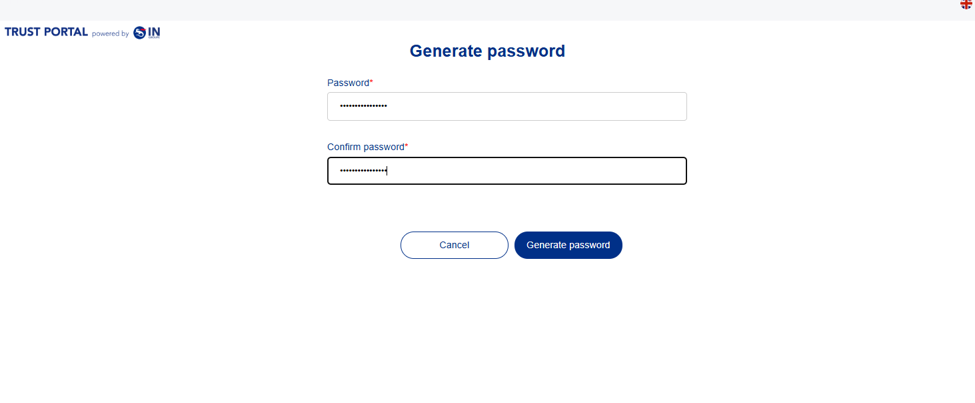
Generate password
Choose a password and click Generate.
Please remember your password, as you will need it to access the Trust Portal trial version.
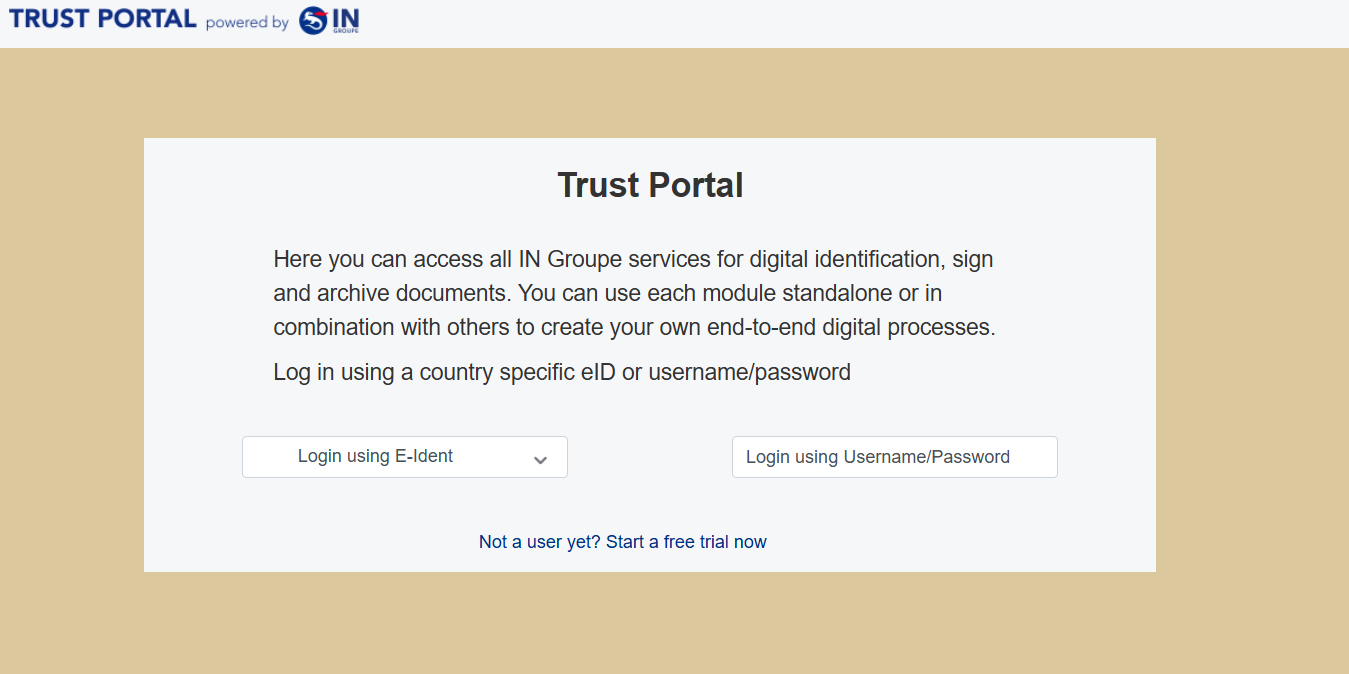
How to log in
When password is created, click on the Trust portal trial version, choose “Login using Username/Password”
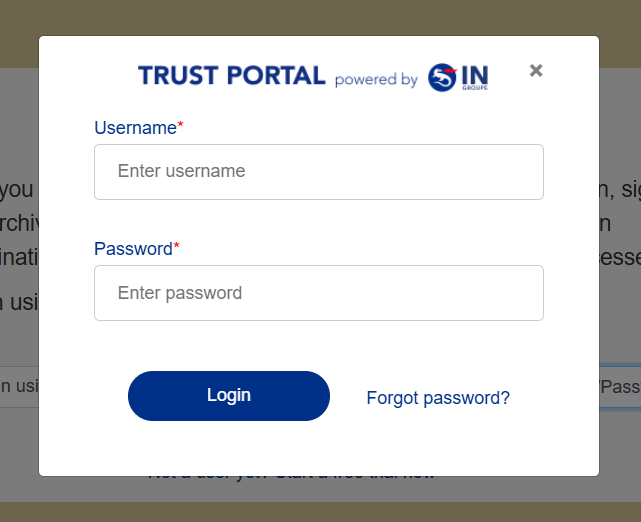
Enter your e-mail as username and your password.
Next you will see a popup for entering One time password, this you will receive in a separate email. Enter the OTP, click “Submit” and you are in!
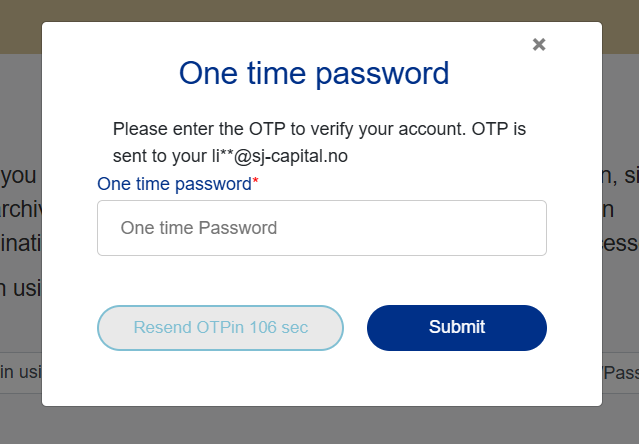
Trust Portal homepage and settings
My settings
First time you log in, you are navigated to “My settings" page where you decide your preferences regarding language, service and page, where to land next time you log in. You can go to My settings page later as well, to change your settings.
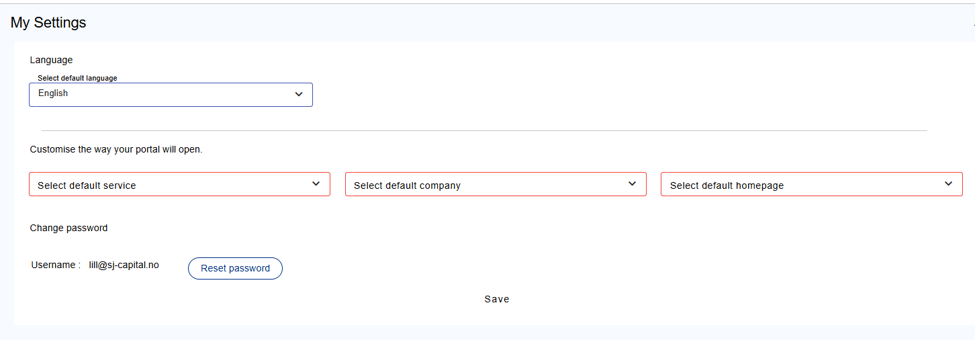
In free trial you have access to Order list page and Create order page
Homepage: Order list
If you choose default homepage as Order list in My settings, this will be the landing page next time you log in.
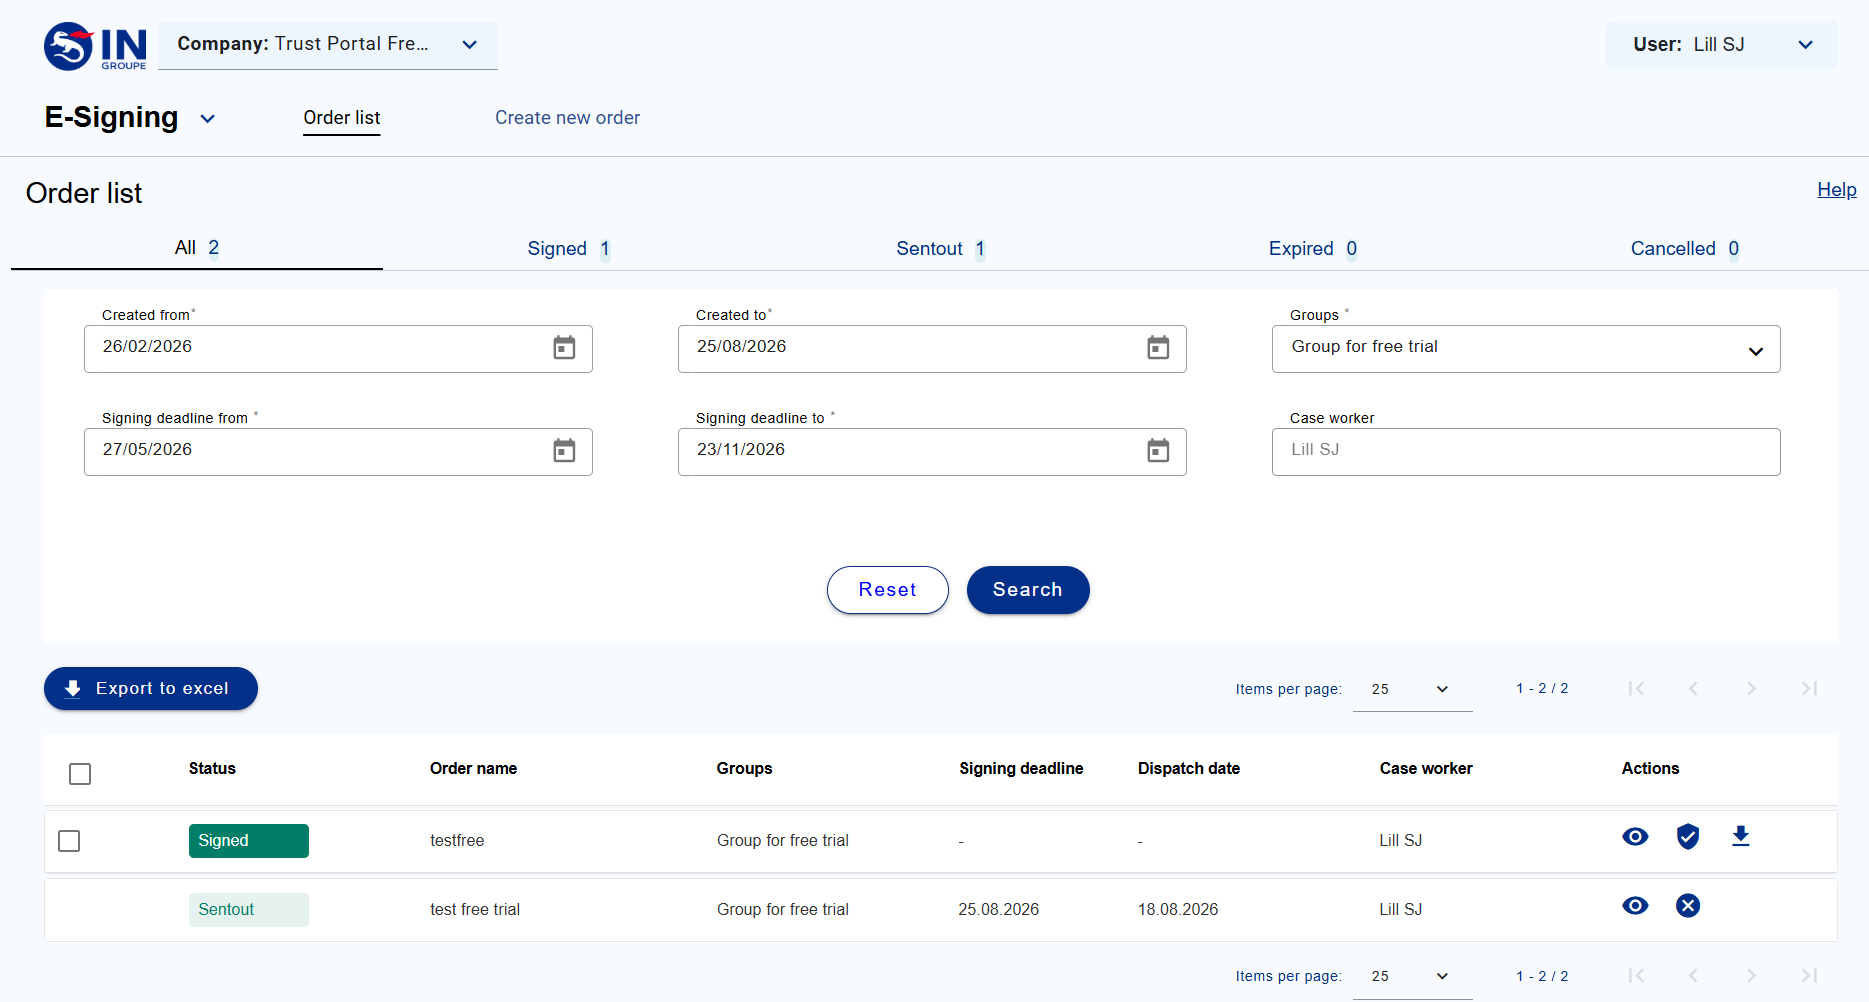
At order list page you can track and manage your signing orders. To get started, you first need to create a new order.
Create new order
Follow the steps, fill out the details and click on “Next” button to create a signing order.
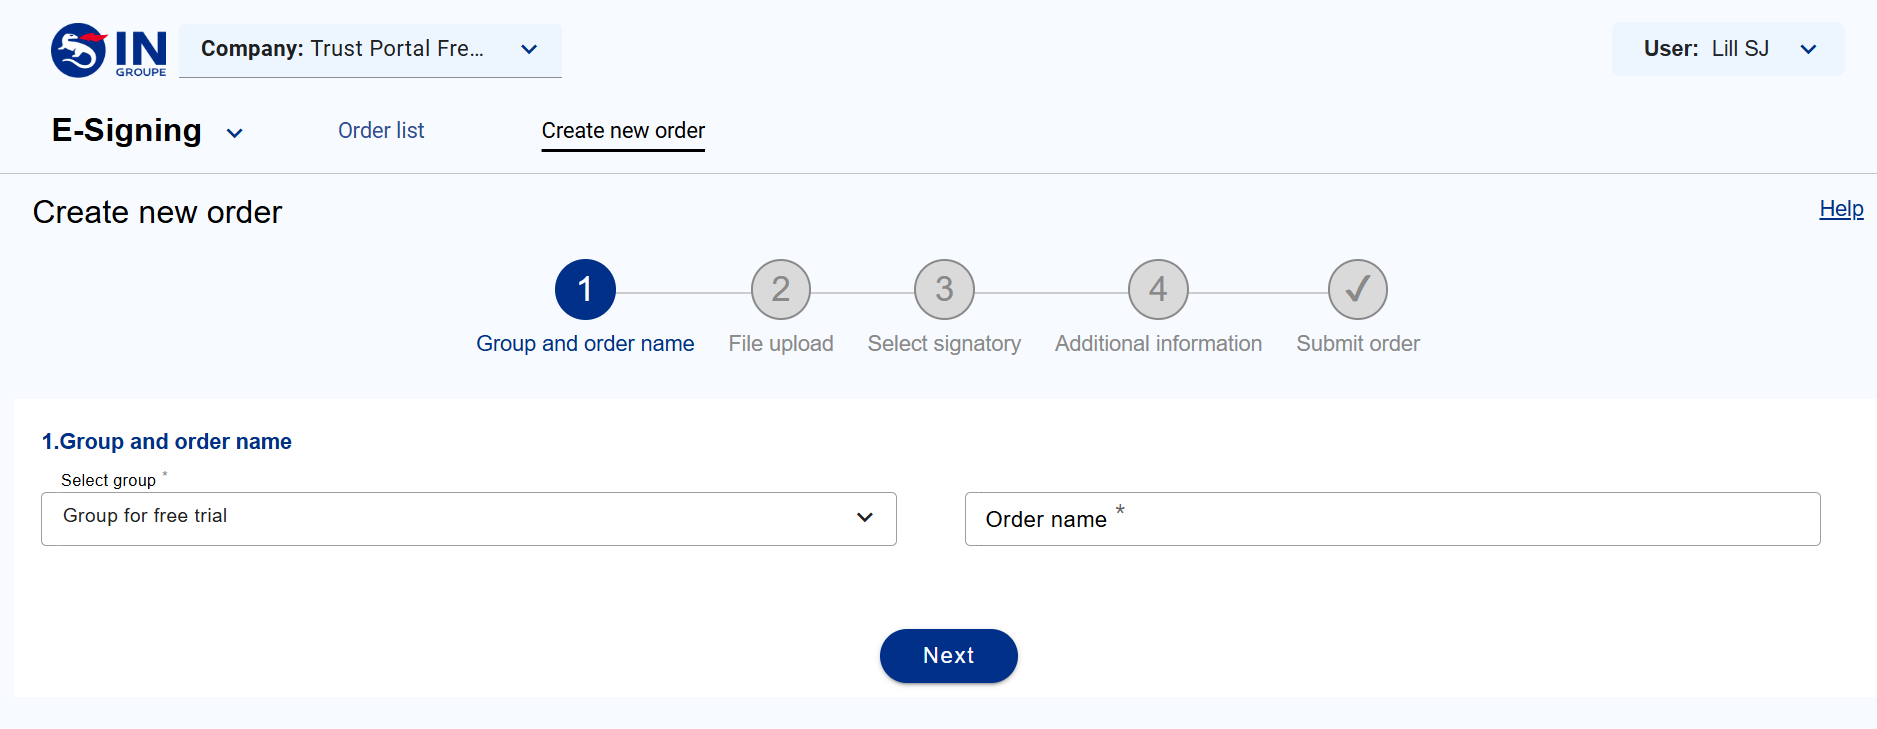
Step 1 Group & Deadline
-
Select Group: the free trial solution has only one group, and this group is pre-defined and will be shown by default in the dropdown. In full version solution you can configure and choose among as many groups as you need
-
Enter Order name: Order name is the name that the order is registered with. Name of the order is for your own reference to the signing order and will be shown in the order list upon creation
-
Click on “Next”
-
In full version solution “Choose dispatch date” and “Signing deadline” can be set either by default or decided by the caseworker during order creation. In Free trial the dispatch date is today (immediately while creating the order) and Signing deadline is 7 days from dispatch date.
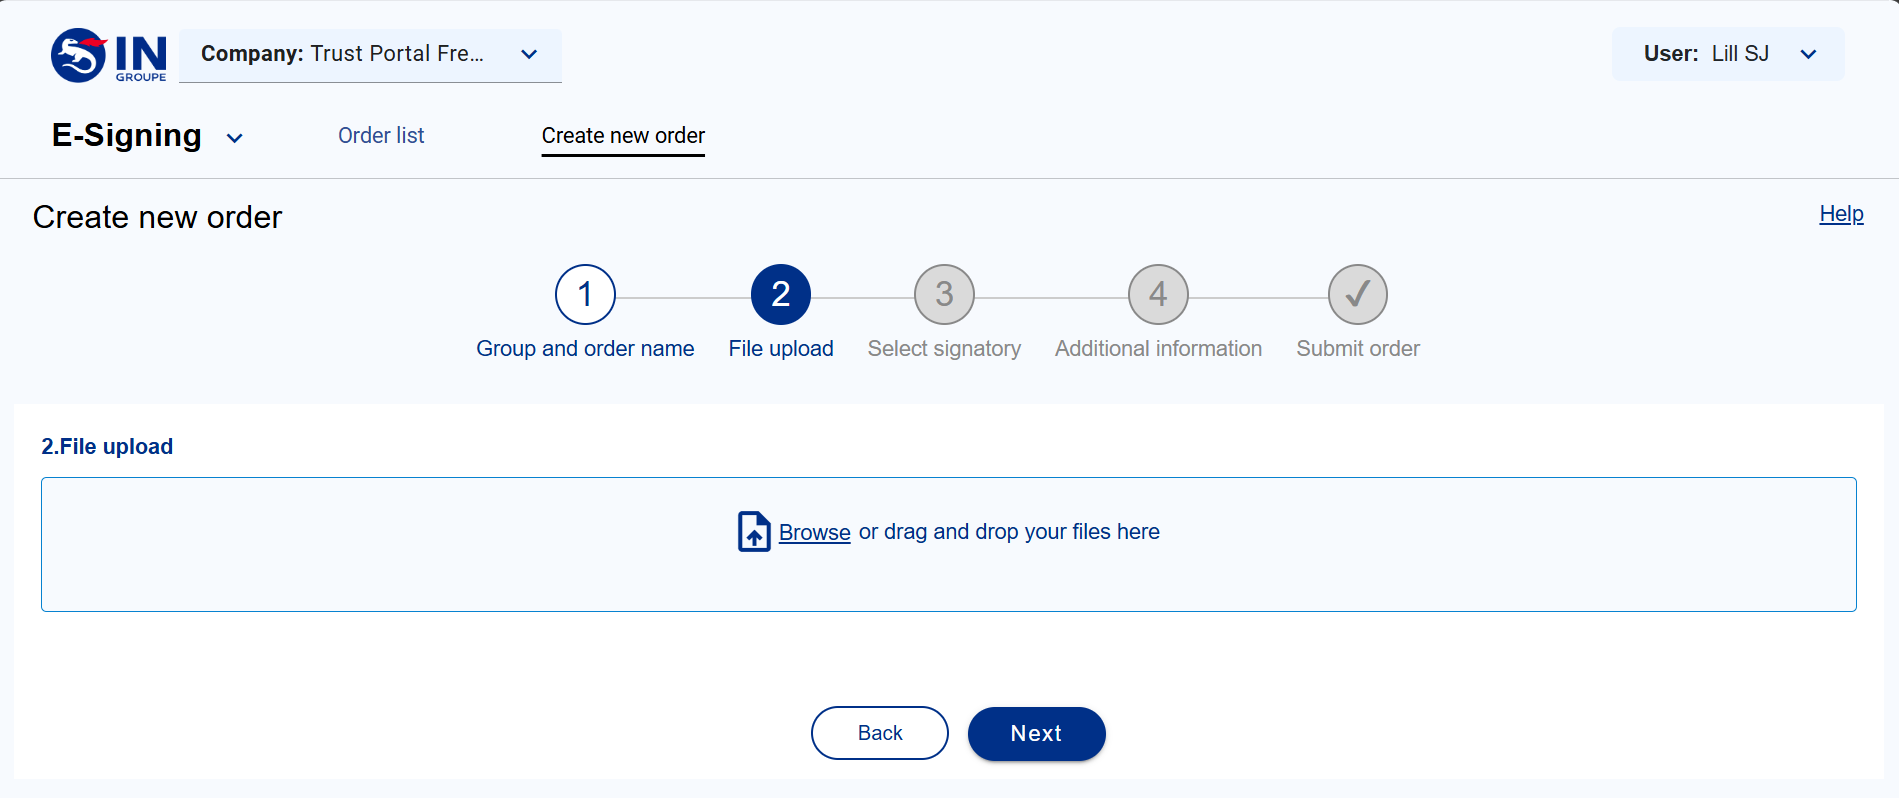
Step 2 File upload
-
File upload: to upload a document to be signed, you can use Browse or the Drag and drop option
-
Click on “Next”
-
PDF format is allowed. PDF with form fields is allowed only in full version solution. Free trial version has a restriction for uploading only one document. Each document can be up to 7 MB. For full version solution it can be unlimited number of documents and the total order size can be up to 20 MB
-
Uploaded file name is displayed as document name. The document name will be displayed for the signers in signing process
-
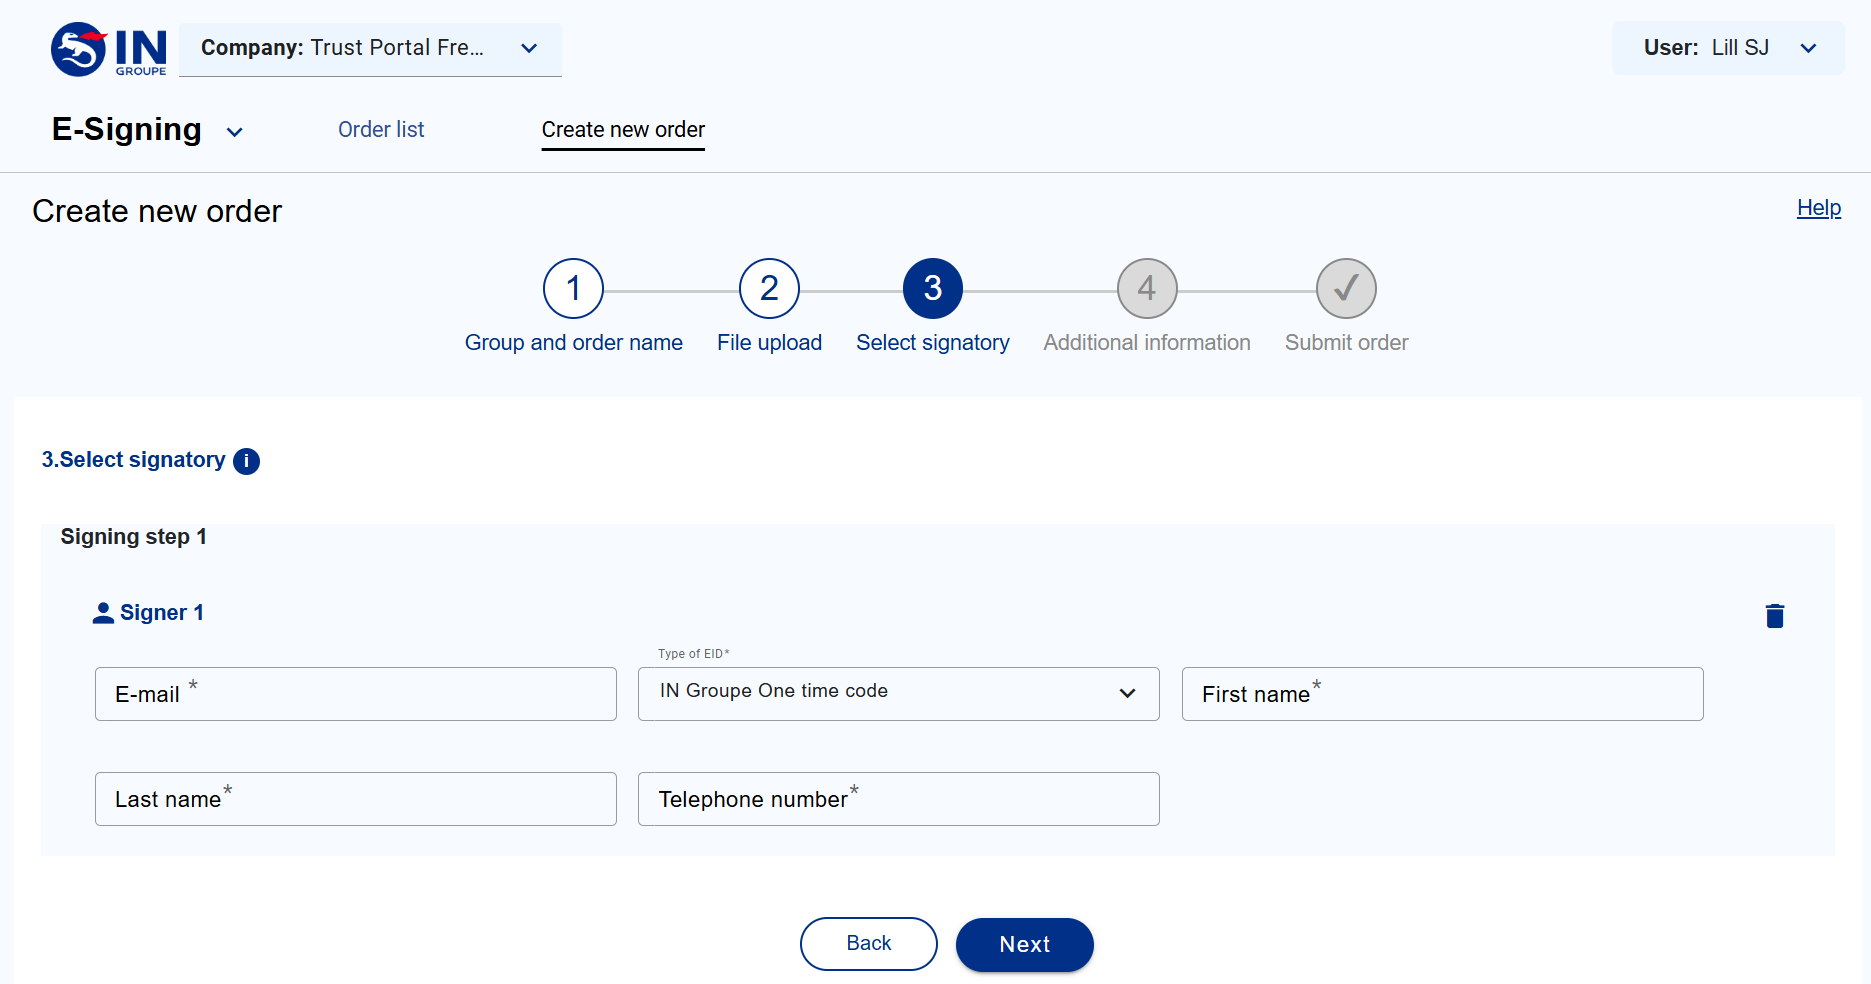
Step 3 Select signatory
-
Enter identification data: e-mail address, name and telephone number for the Signer must be entered
-
The Free trial version is restricted to have only one step and one signer. In full version solution you can choose between serial (add steps) or parallel (add signatory within same step) signing of the order and add more signers to each step.
-
The Free trial solution is restricted to have only one eID, the “IN Groupe One time code” (meaning you will use your mobile number in signing process). In full version solution we have support for several eIDs
-
Click on “Next”
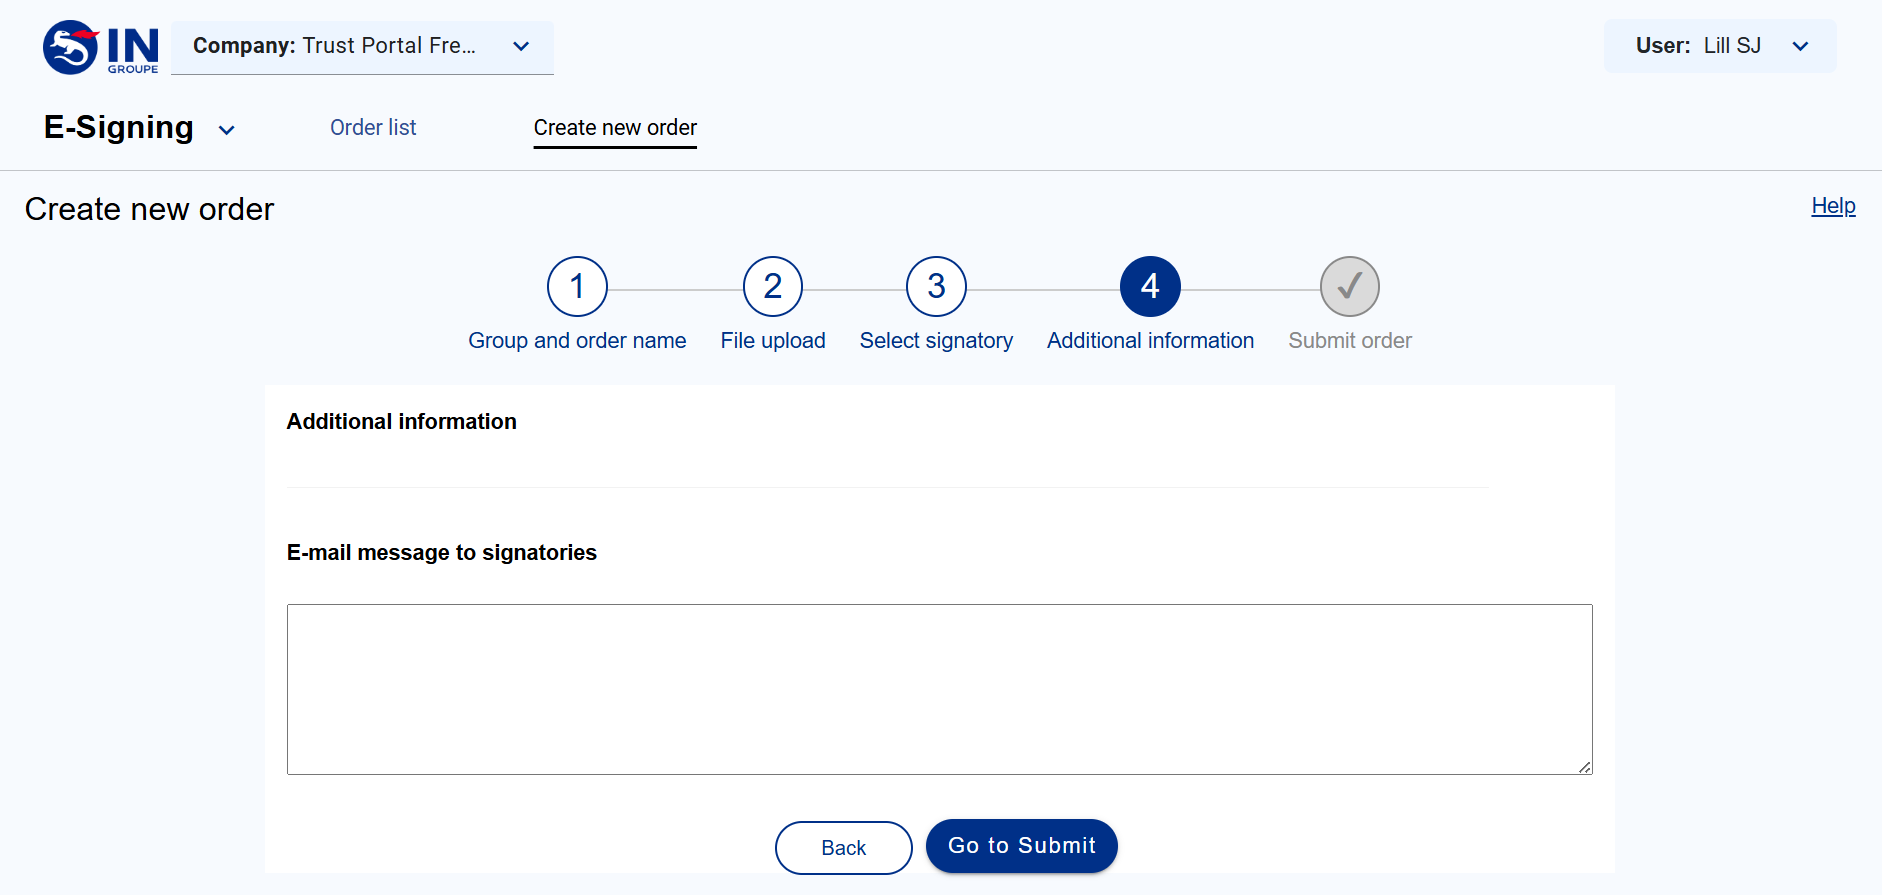
Step 4 Additional information
-
E-mail message to signatories: The caseworker can choose to add a message to the signer, this will be shown in the email with the signing link
-
The free trial solution has the email template for “Order created” pre-configured. In full version solution you can create your own customized templates.
In full version the logged in caseworker can be notified by email for the statuses below, selecting any/all these options:
-
Has been signed
-
Is reaching the expiry date
-
Has expired
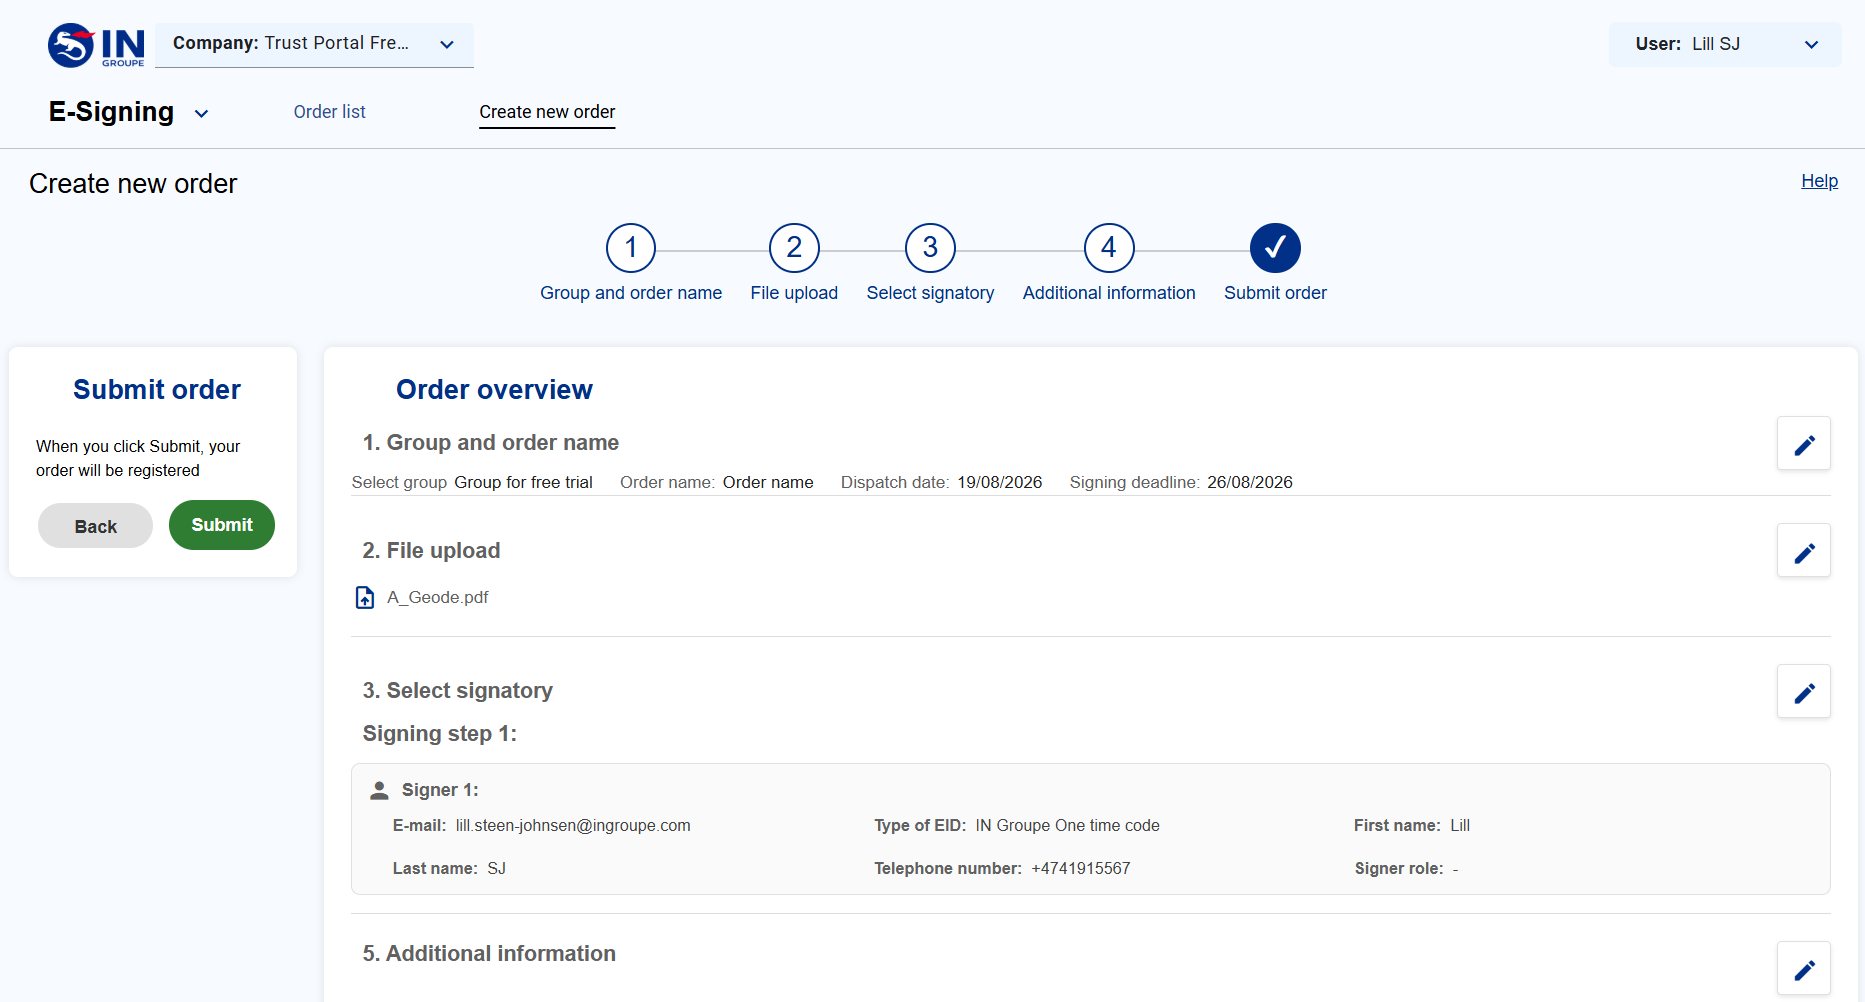
Last step Submit the order
-
Last page gives you an overview of what has been entered, and here you can go back and make changes if needed, before submitting.
-
Click the “Submit” button to register the order
-
When order is submitted, an email with signing link will be sent to signer, and the order itself will move to Order list page
Order list page
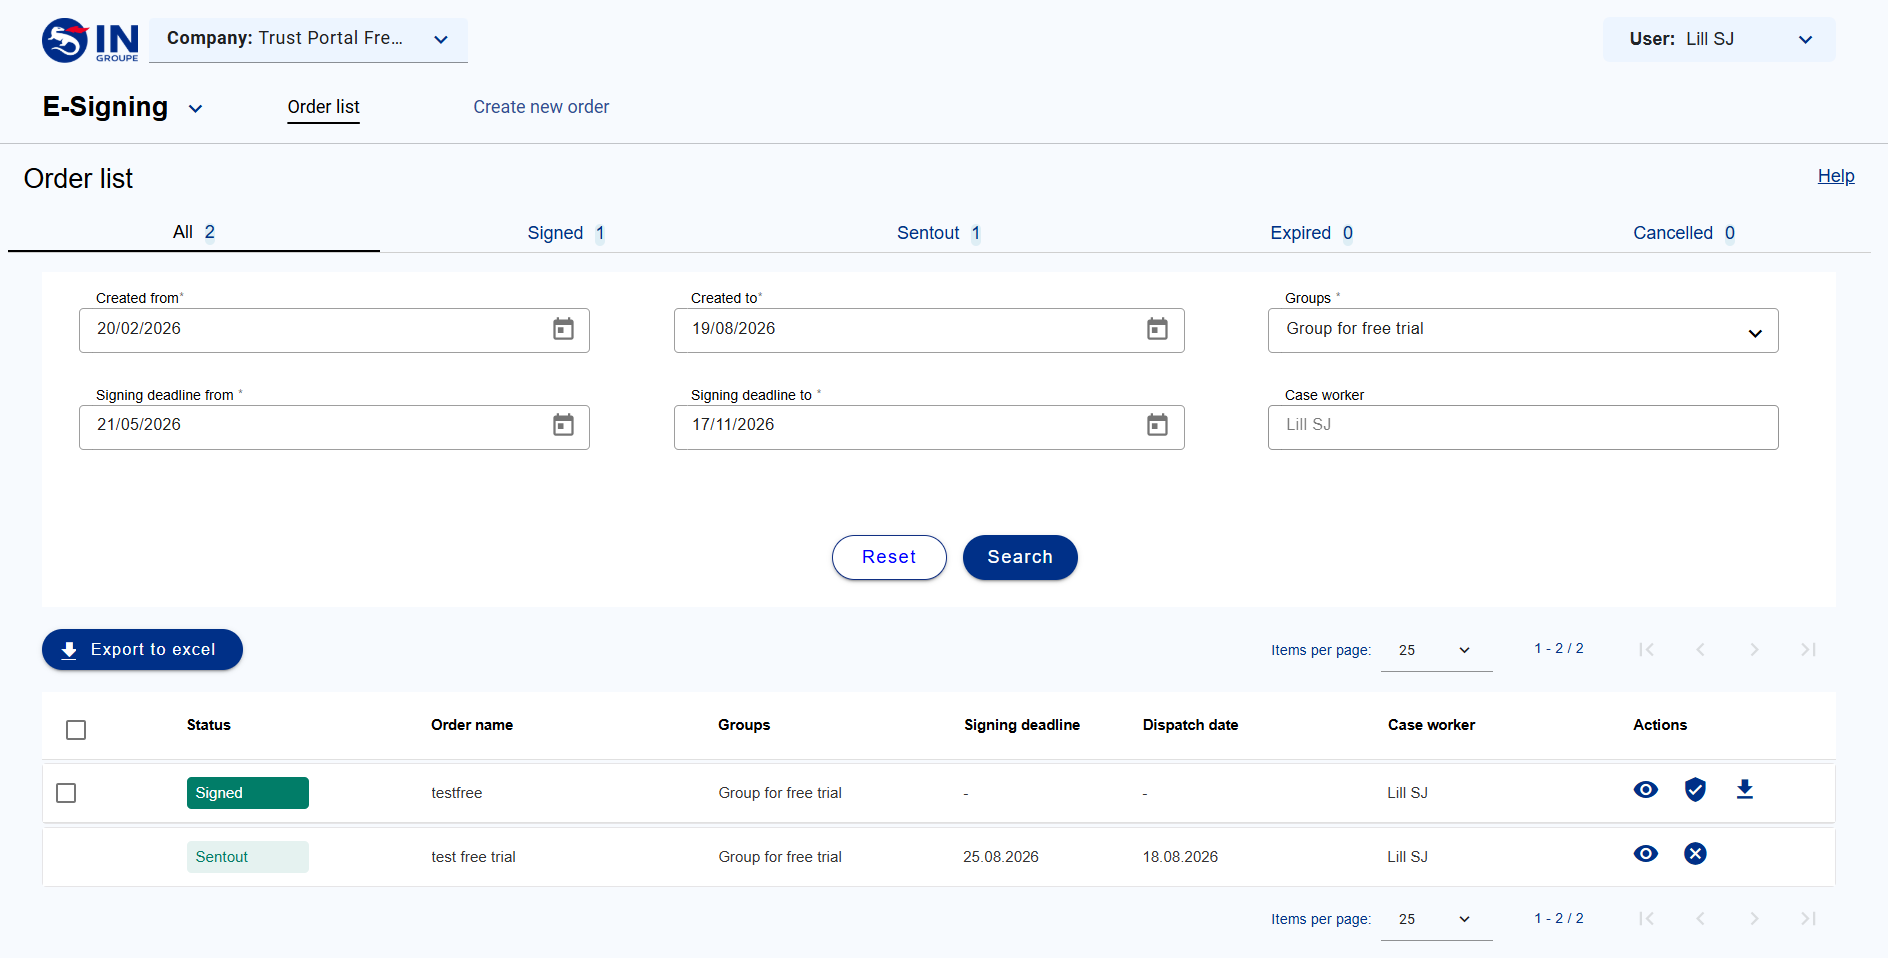
When an order is created, you can follow the status for the specific order on the Order list page.
-
Created/Signing deadline from/to: Search filter for the orders created/signed from/to specific dates
-
Groups: Select the group for which the orders need to be filtered. Since Free trial contains only one group, this will be the one shown
-
Case worker: Select the caseworker for which the orders need to be filtered. Free trial solution will only show the logged-in caseworker
At any point in time after a signing order has been created until it has been deleted, it will be listed in exactly one of these 5 statuses: Signed, Sent out, Not sent out, Expired and Cancelled
-
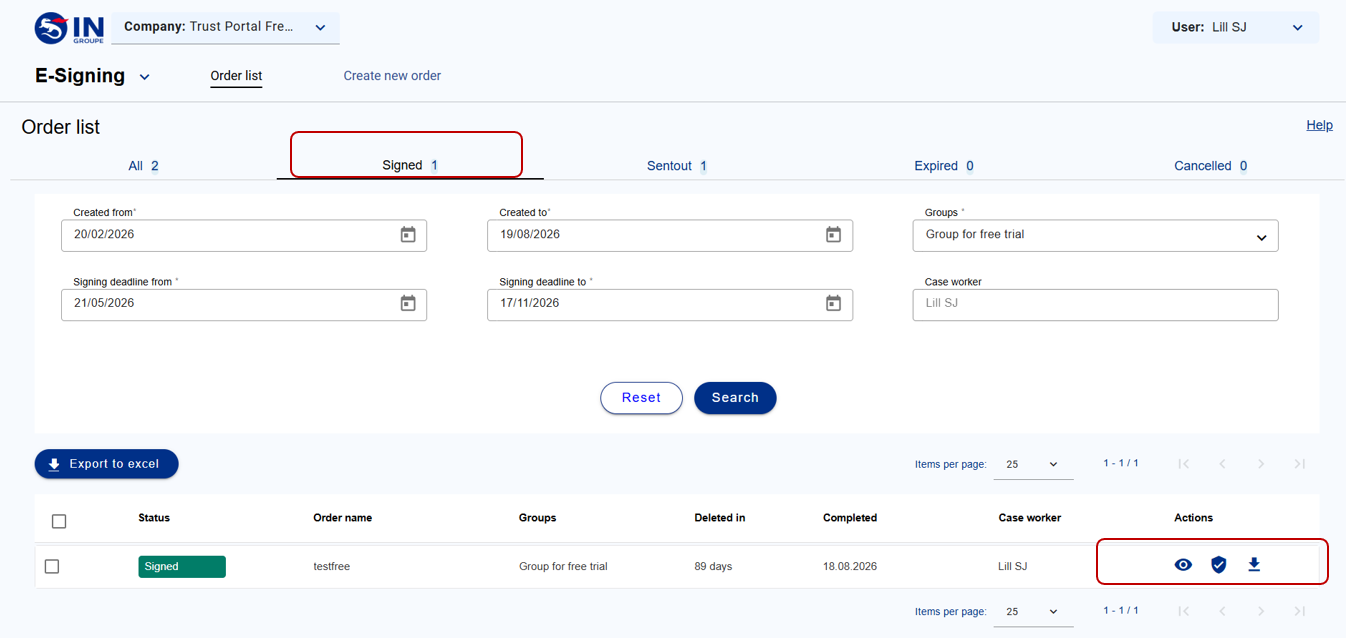
Signed: When all Signers have signed an order within the signing deadline, the order will be listed in the Signed list
-
-
View: Displays order details of orders that are signed
-
Validate: Will show the result of the signature validation process within your current window
-
Download: Pop up opens to select either PDF or SDO. For full version solution, the documents are available for download for up to 90 days after signing, at which time they are deleted. In full version when eID is chosen as signing method, you can choose between
-
Show SSN: SSN for all signers will be displayed in an extra line in the Signed PDF
-
Hide SSN: SSN will be removed from 'Identifier' for those eID's where this is SSN (BankID NO, SE, FI)
-
-
-
Sent out
-
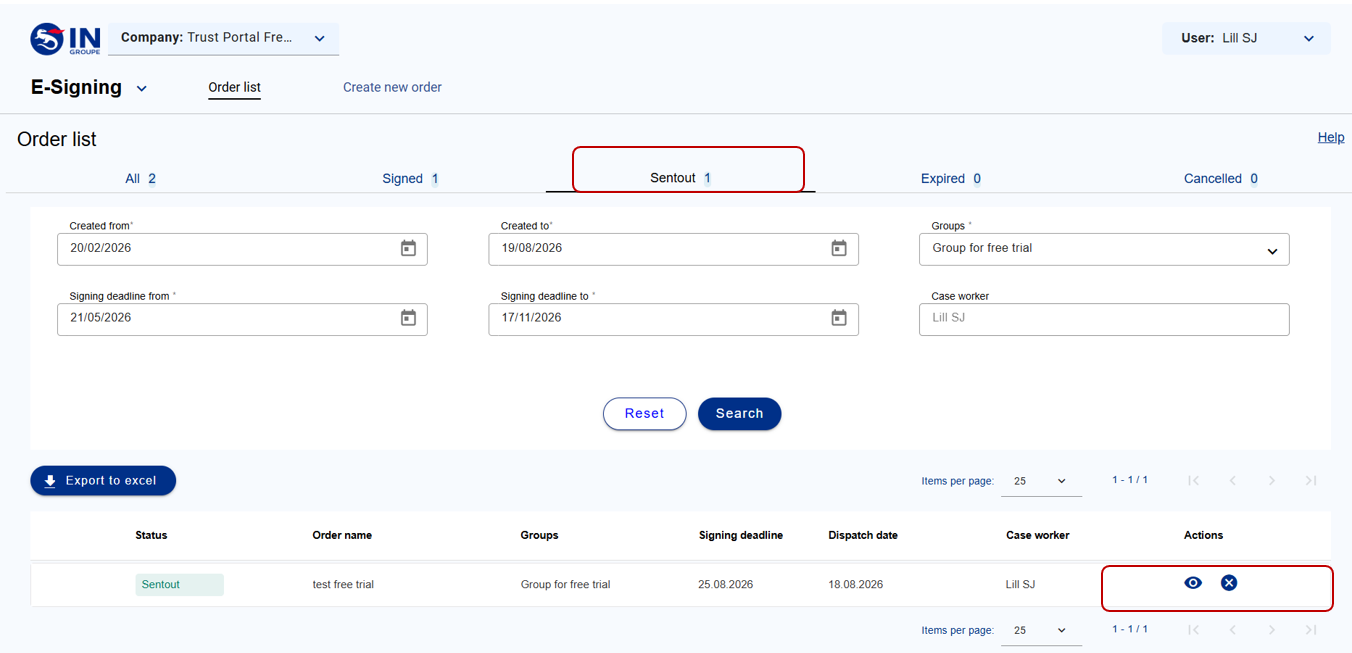
Signing orders that have been created and dispatched to the Signer but not yet signed by all Signers
-
-
-
View: Displays order details of orders sent out
-
Cancel: Cancel the signing order causing it to be listed in the Cancelled list
-
-
Expired
A signing order has an expiration date (signing deadline), set at the time of order creation. The Expired list will show signing orders not signed by all Signers before the expiration date
-
-
View: Displays order details of orders that are expired
-
In full version you also have the option to change signing deadline and re-activate an expired order
-
Cancelled
Any order that has been cancelled will be shown in the Cancelled list until it has been deleted
View: Displays order details of orders that are cancelled
Following modules are disconnected from the Free trial version:
Configure E-Signing
E-Archive
ID-Rights
Recover PAdES
Read more about the different modules here